Get 4 Foods from 1 Gallon of Raw Milk - Pt 2
In part 1, you got the skinny on how to make homemade cottage cheese and whey from raw milk. Well, here's what to do with all that delicious, slightly cultured, thick and lovely raw CREAM!!! Let's make some buddah!
How to Make Butter and Buttermilk from Raw Milk Cream
Yield: 1/2 C butter and about 1 C buttermilk
INGREDIENTS
2 C raw milk cream, slightly cultured -- today, we say cultured, but we used to say curdled or spoiled.
EQUIPMENT
1 food processor or blender (if you only have a little cream, you could use a stick blender in a Ball jar)
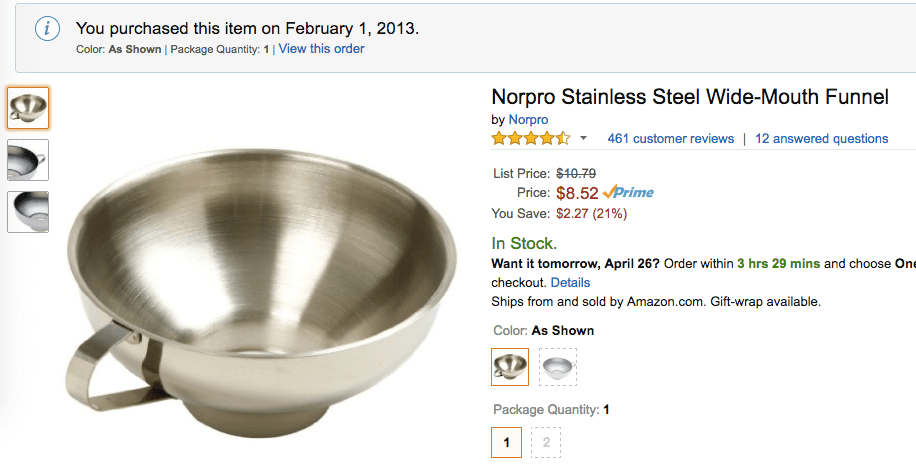
1 Ball jar funnel (see picture below, it links to the funnel on Amazon and fits wide and small mouth jars)
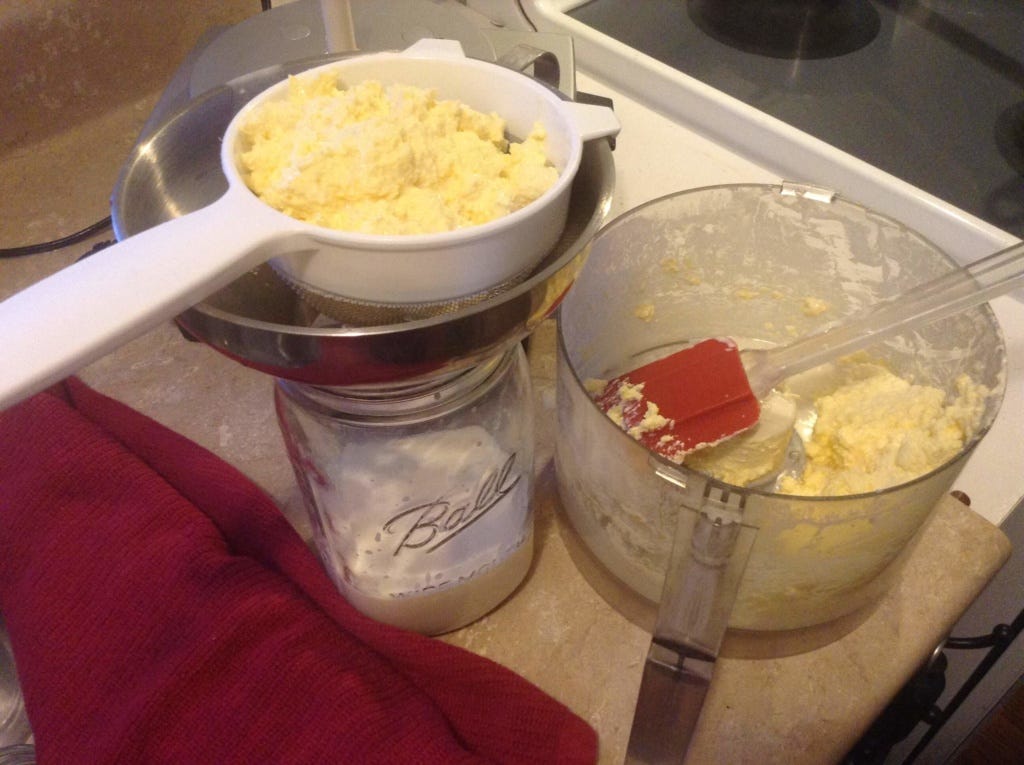
1 strainer that fits in the funnel (the middle one here fits)
1 silicone spatula or wide flat wooden spoon
1 quart jar with a lid for the buttermilk
1 bowl for rinsing the butter
Ice cubes and/or ice water

Instructions: the goal here is to separate the butterfat from the buttermilk.
STEP ONE Pour the cream into the food processor/blender. No more than 2 Cups at a time!!! Every article I've read on the topic warns not to put in more than 2 Cups. I ignored this advice and paid the very messy price. You've been warned.
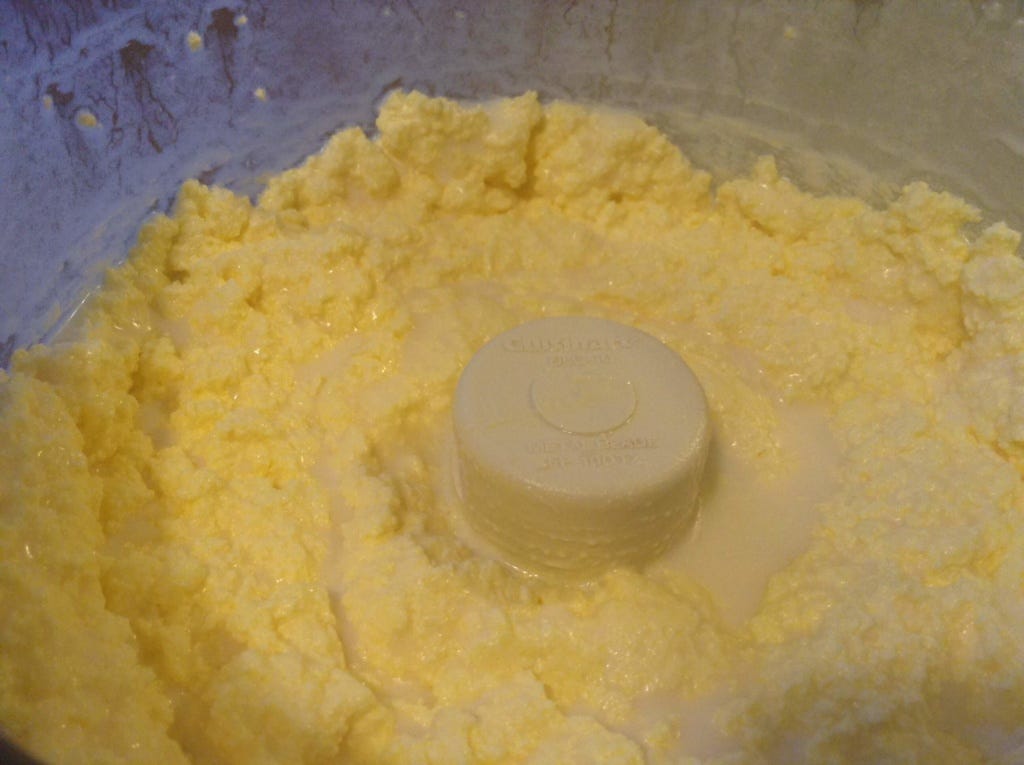
STEP 2 Blend for 30-50 seconds (that's how long it takes in my food processor). You'll see the cream go from thick to smooth to grainy-looking butter in less than a minute.

STEP 3 Put the funnel and the strainer on top of the quart jar. Leave the butter in the processor/blender for the moment. Holding the butter back with the spatula, pour off as much of the buttermilk as you can into the jar. Use the spatula to mix and push the butter around to release the buttermilk. This is where to take your time if you love buttermilk, pushing and pressing to get as much as you can.
NOTE: The strainer is really there to keep the butter from falling into the buttermilk. You can put the butter little-by-little into the strainer to try and strain off more buttermilk, but I found that required a lot of time and effort for very little reward. Just skip to the next step with ice cubes/water. Oh, you put the lid on your buttermilk and into the fridge -- that's done!

STEP 4 Put the butter in the bowl. You're going to "wash" as much of the residual buttermilk out of the butter as possible. The "cleaner" the butter, the longer it will last, plus you can cook with it more easily. If there's buttermilk in the butter, it burns quickly in the pan.
STEP 5 To wash the butter, you can use ice water or ice cubes or both. You are making the butter cold so that it contracts, pulling together and pushing out the buttermilk.
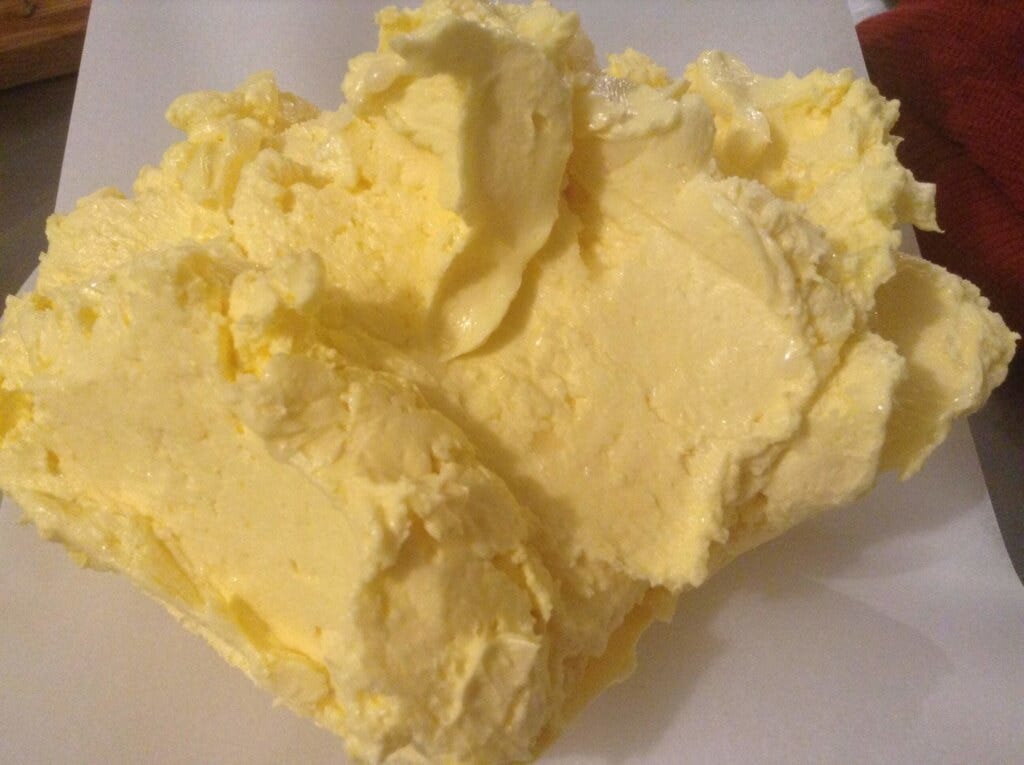
You've probably noticed by now that your butter is so yellow it looks fake, right? Hmmm.
STEP 6 Add 3-5 ice cubes to the butter and/or 1/2 C or so of ice water. Using the spatula, mix and push the water/cubes through the butter, pouring off the buttermilk/water as you go. (I give this buttermilky water to the chickens.) Keep doing this, adding more ice water as needed, until the water runs pretty clear. Life is too short to wait until it's perfectly clear. And you'll be eating that butter way before it could ever go bad, so don't sweat it!
STEP 7 When your butter is clean, you can salt or flavor if you like, then transfer to your butter container and refrigerate. That's it!

You now have FOUR versatile foods from ONE gallon of raw milk: cottage cheese, whey, butter, and buttermilk. I find that completely awesome and slightly mysterious.
Sometimes, I imagine my great grandparents looking down at me, shaking their heads at my utter joy and amazement over foods and processes they ate and made as a matter of course. Oh, how far we've strayed -- and thank goodness we are on the way back -- to life-giving foods.
Do you make homemade butter and buttermilk? Please share your tweaks and tips below, sharing is good :)
